
shoc FAQ Reader
How to Connect a NARDA SignalShark to go2MONITOR
This process should be checked with the latest VITA 49 driver. Many things have been changed and are now much easier to configure.
Assumptions, Requirements
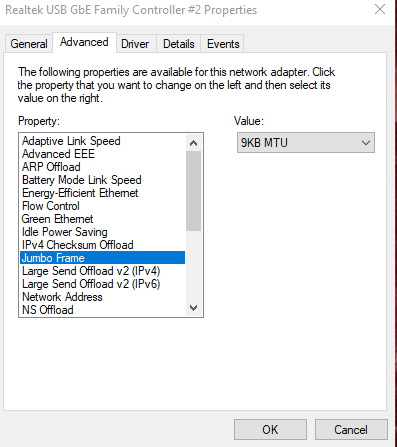
- JumboFrames enabled on all devices, switches etc.
- Disconnect the DF antenna (ADFA) if you have go2MONITOR 20.1.1 (or older). Update to 20.2 if the antenna is required.
- Study the actual go2MONITOR and SignalShark manuals
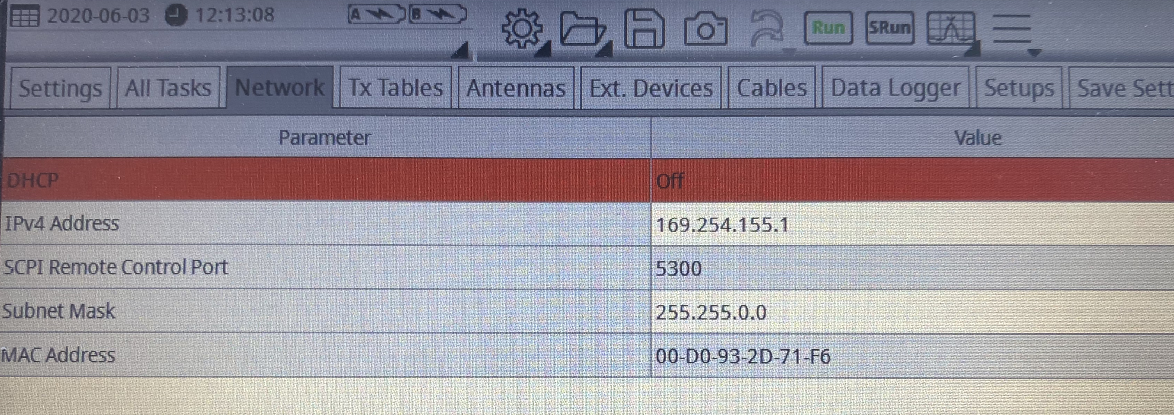
- 169.254.155.1 : IP address SignalShark
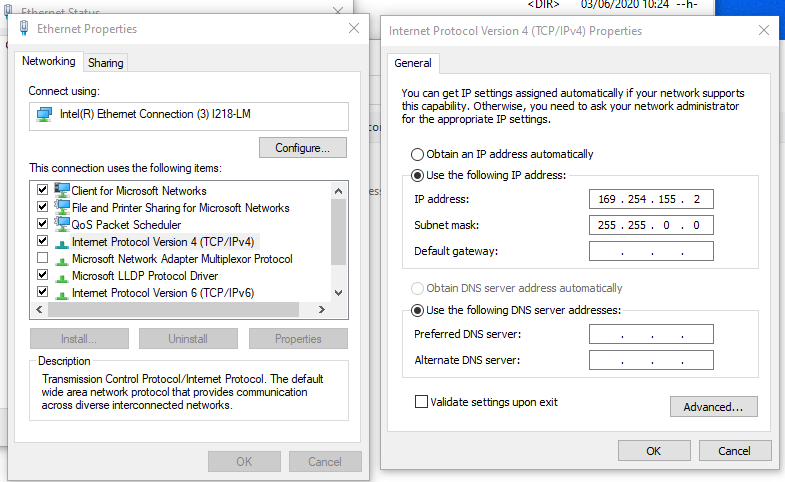
- 169.254.155.2 : IP address computer (Laptop, server etc.)
- Sub net mask: 255.255.0.0, RX and computer addresses should be in the same network segment
- No DHCP (otherwise you must setup DHCP to always use the same addresses)
- No firewall (otherwise setup the correct IP addresses and ports)
- Windows10
Procedure
- Install go2MONITOR on your computer. Start go2MONITOR and load the correct license file.
- Connect the SignalShark with an Ethernet cable to your computer (or connect receiver and computer to a LAN)
- Setup/verify the IP address of the SignalShark (e.g. 169.254.155.1)
- Setup/verify the IP address of your computer (e.g. 169.254.155.2)
- Check Jumbo frames
- Ping your SignalShark. In Windows, hit Windows+R.
In the Run window, type “cmd” into the search box, and then hit "Enter". At the prompt, type “ping 169.254.155.1” and check if the SignalShark replies. If not, check your setup and LAN.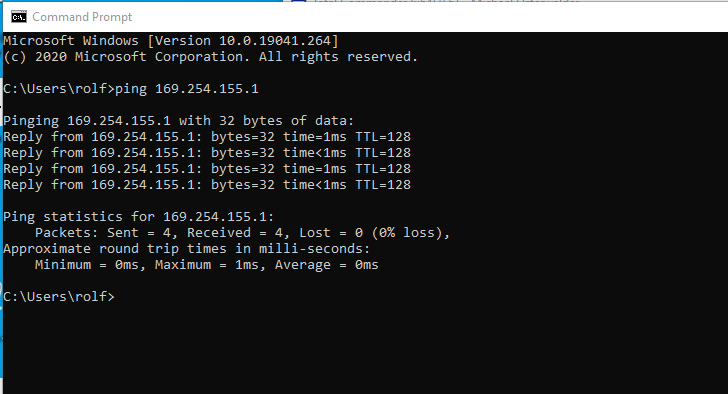
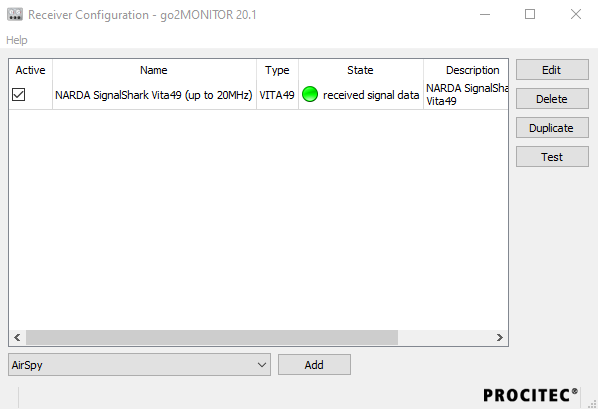
- In go2MONITOR click on 'File', then click 'Wideband receiver configuration', then click "Yes" to open the Receiver Configuration window.
- In the dropdown box, scroll down and select "NARDA SignalShark, Vita.49 (up to 20MHz) ". Click "Add" to add it to the list of receivers.
- Check that "Active" is selected
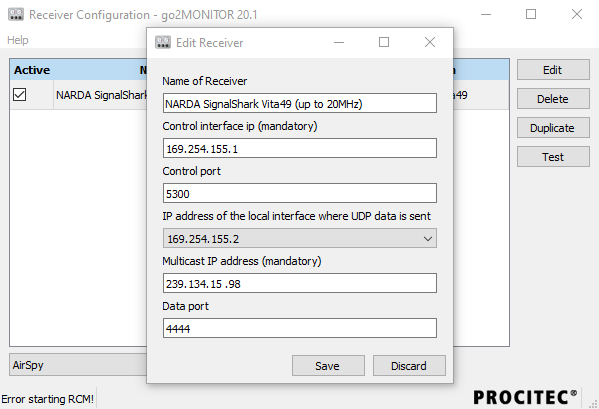
- Select "NARDA SignalShark, Vita.49 (up to 20MHz) " and then click on "Edit"
- A new window will open.
Now enter the SignalShark IP address into the field "Control Interface ip" field (e.g. 169.254.155.1)
"Control port" should be 5300
In the grey drop down box "IP address of the local interface where UDP data is sent" select the computer LAN interface that is used to connect to the receiver (e.g. 169.254.155.2). Normally you will only see one IP address. You must choose between several if there are multiple LAN interfaces or VPN.
"Multicast IP address" don't change it (normally 293.134.15.98)
"Data Port" don't change it (normally 4444)
Click "Save" to store your settings - Click on "Test" and after a few seconds, the "State" field in the receiver list should indicate whether the setup was properly done.
- Close the "Receiver Configuration" window and start go2MONITOR again
- If go2MONITOR is running select "NARDA SignalShark, Vita.49 (up to 20MHz) in the "Input" drop down list.
You should hear a 'click' from the SignalShark and its display goes all black with only one botton indicating 'local' (don't push that button !!!)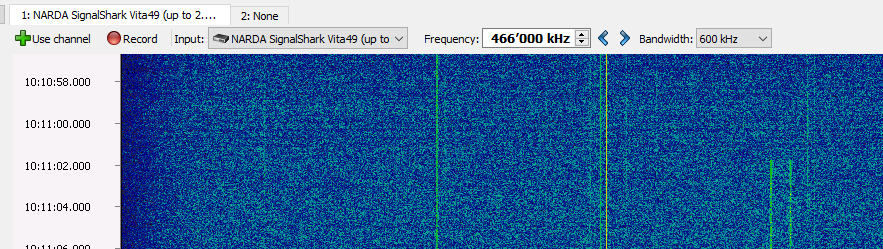
The receiver should be in remote mode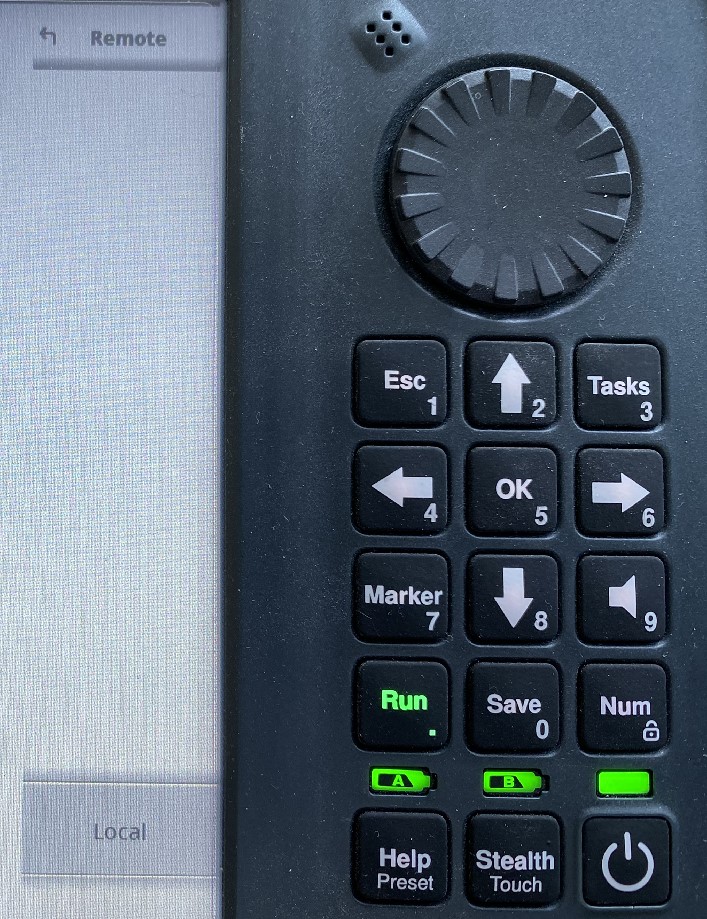
- Enter now a frequency and bandwidth you like to monitor.
Start with a low bandwidth of 600 kHz and later check the limits set by the license or computer performance. - That's it
In Case of Problems
- Restart the computer and the receiver
- Check again all the parameters
- Open with Notepadd++ the file "c:\Users\xxxx\go2signals\go2MONITOR xx.x\receivers_wb\NARDA_SignalShark_20Mhz.conf".
Check if the IP addresses are like
<add value="10.20.21.4" key="IPAddr"/>
and not like
<add value="010.020.021.004" key="IPAddr"/> - If it does not work, you can also check whether the data is reaching the network adapter from the receiver. So check in the Task Manager how much data is arriving. Then check whether the data rate in the Task Manager changes when you change the bandwidth in go2M.
- Can you control the receiver, is it going to remote mode?
Last update on 2024-03-07 by Rolf Haenggi.